Matching HDD Tooling to Terrain for Productivity and Profitability
Horizontal directional drilling (HDD) is no different than any other business, whether you’re a NASCAR driver or working for a Jimmy John’s sandwich shop, productivity is the name of the game. Getting the job done right and freaky fast delivers the best results, which translates directly into higher profits.
When it comes to HDD, productivity and more importantly, profitability do not equate to buying and using the cheapest tooling you can find. Although cost reduction is an important element of every business, cutting corners by using tooling that is not suited to the terrain of the bore path not only significantly reduce productivity, it may also risk the successful completion of the bore. It goes without saying that this will definitely affect your profit, as well.
Alexander Graham Bell famously said, “Before anything else, preparation is the key to success.” Matching the tooling to the ground conditions you will be drilling is one of the best ways to ensure optimal production and successful bores.
Know Your Ground Conditions
The starting point of this process is to identify the composition of the terrain where you will be drilling. This will point you in the right direction when deciding on the drill and tooling to use. There are many ways to acquire this information, including: researching geotechnical soil surveys published by the USDA Natural Resources Conservation Service (NRCS) and available from several sources, such as its website, libraries and state NRCS offices; geotechnical investigations (soil cores and pothole sampling), experience in the jobsite location and information from local utilities and even other contractors that have experience in the area.
Now that you know the ground conditions to expect on your bore, you can put this information to good use in identifying the most productive tooling for the terrain. Some people may not consider drill pipe to be tooling, but I do because the pipe is the most expensive wear part on directional drills and the foundation upon what you build the rest of the drill string.
So, the first thing you will want to make absolutely sure of is that your drill pipe is in good condition because if you break a connection or snap a rod it won’t matter how well you have matched your tooling to the ground conditions because it will be disconnected and quite possibly lost underground. It’s a guarantee that you will lose productivity and profitability if you have to halt or abort the bore, dig up your tools, or go fishing for them and then resume the bore or start over. That’s if you are fortunate enough to be able to retrieve your tools. Obviously, lost production and replacing tools will cut straight into your bottom line.

Examining the Pilot Bore
The pilot bore will be the first drilling process undertaken so let’s examine what contacts the terrain first and is definitely one of the most important tools in your truck, pilot bits. For our purposes, I’ll break these into two categories, rock drilling pilot bits and everything else. Regarding rock, I am referring to the “stable” rock soil classification. Examples of these rock formations are granite, sandstone, basalt, limestone, quartz, and many others.
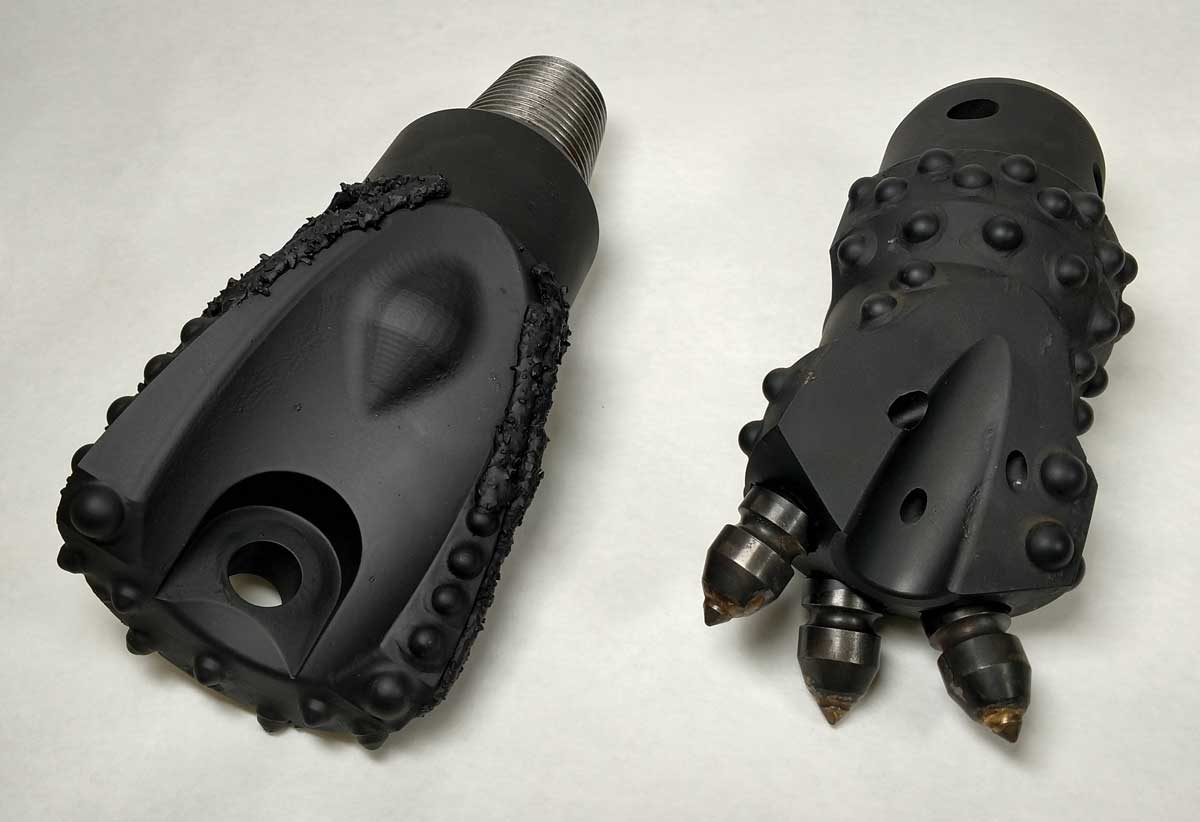
Drilling in these conditions will require one of the following rotary pilot bits, a polycrystalline diamond compact (PDC) bit, a tricone bit, steel mill tooth for softer formations and a tungsten carbide insert (TCI) bit for harder formations, or a percussive style slant face or convex face pilot bit, which are used with air hammers. All of the rock drilling pilot bits noted above require additional equipment for use, such as mud motors, air hammers or dedicated rock drills which incorporate a dual rod drilling system.
When it comes to “everything else,” with regard to terrain, I will classify that at approximately 10,000 psi and below, even though many softer rock formations fall beneath this rating, with the advancement of conventional (single rod) drills and tools, they are capable, even efficient drilling in these soils. The most common style of pilot bits for this terrain are bolt-on blade designs, of which there are many. These bits bolt on to slant-face transmitter housings and are also bent at roughly 10 degrees near the front which provides them with steering capability. Do your research here because many of these bits overlap each other when it comes to the ground conditions in which they work best.
Experience helps to narrow an operator’s selection because they may know what they like in certain soils and also know how to push, steer and drill with a particular bit, but don’t stick with the same bit when conditions change because productivity and profit may be compromised. There are also bolt-on, spline drive and more commonly thread-in style rock bits for these soils, manufactured with steering features built in to them. The advancements in this area have enabled contractors to drill in tougher ground conditions quite productively. For example, drilling in cobble has, and still is difficult for many reasons, but some of the newer cobble style bits are making it considerably easier. Bits with replaceable carbide teeth are also good in tough conditions, but also drill and steer very well in less difficult soils, such as dry, compacted soils and fractured formations. If you have a box-x-box housing, you can change out a threaded bit, used for tougher conditions, with a thread-in adapter which allows you to use a bolt-on blade bit for lighter soils. These are great when you encounter significant soil changes on the same bore.
HDD Backreaming
If your bores require backreaming (enlarging the pilot hole during pullback for product installation) you should use the same information choosing backreamers as you do choosing pilot bits. Just like pilot bits, there are many styles to choose from. If you are backreaming in hard rock, you will require a hole opener with TCI cutters or a PDC reamer. For “everything else” there are cutters, mixers, packers and combinations thereof. Unfortunately, there isn’t a “swiss army knife” backreamer available because reamers can be rather expensive, but the fluted reamer is probably the closest. It covers the middle range of ground conditions, but will not work well in the softest or the hardest, not to mention reactive clays. When sizing backreamers, a general rule of thumb is to use a reamer that will create a hole that is 1.5 times the size (OD) of the product being installed.
I have focused on pilot bits and backreamer tools here because these are the tools that have primary contact with the terrain, but I would be remiss if I didn’t mention the importance of drilling fluids, which obviously interact with the terrain. Bentonite and other additives can make or break a bore. Building a good filter cake and creating the proper fluid and slurry viscosity will greatly improve the odds of a successful bore.
As you can see, there are many options when it comes to pilot bits and backreamers so it can be a bit overwhelming learning and remembering which tools work best in every terrain, but there are also other resources you can draw from that will help you when planning bores. Most tooling manufacturers publish charts for pilot bits and backreamers that identify which styles perform best in specific soils. I recommend using every resource available when matching your tooling to terrain because when you are getting paid by the foot, getting the bore done right the first time and doing it freaky fast will net you the most profit.
Al Chancellor is in sales and marketing with Underground Tools Inc.