Getting the Most Out of Your HDD Tooling
 The goal of every boring contractor is to complete a project as quickly and efficiently as possible. Doing so requires proper planning, skill and experience, as well as successful operation of machine, electronics and a variety of drilling tools.
From a contractor’s point of view there is little benefit in equipment or tooling failure, but as a compilation of tooling failures are examined, various causes can be determined that might offer greater drilling insight or alternative procedures that could contribute to future successful bores.
Unquestionably a portion of such tooling failures can be attributed to complex conditions and the unseen hazards that are simply a part of directional drilling. Other failures, however, tend to be the result of destructive practices or procedures. There is no substitute for experience in directional drilling. Like so many other trades, skill and talent are developed over time, collecting knowledge both on and off the drill. Below is a collection of suggestions for maximizing tooling performance from years of examining tool failures and visiting with many experienced rig operators.
Side Load Sonde Housings & Flat Blade Bits
As the most expendable tools used in HDD, there is no shortage of opinions on how they are best utilized. While these tools are employed in softer conditions, there are always challenges and downtime is still costly.
- Use proper size housing and bits: Using the tool you have instead of the tool you need could lead to problems down hole. Undersized tools are subject to greater torque or rotational loads than the tool was designed to withstand. Even though the bore was successful, the excessive loads and flexing weaken various areas that could result in tooling failures on subsequent less difficult bores.
- Replace worn threads, bolts and doors: Examine tools for wear before and after each use. A large number of tooling failures are simply a result of wear. Sonde housing doors or lids should be replaced as soon as signs of wear become apparent, such as when the tabs that hold the door in place become thin or as the outside of the lid wears down below the diameter of the housing body. Replace subs or tail piece threads that show signs of thinning. This is especially true on Quick connect/hex collar systems where the connection threads tend to be thinner. Do not reuse bolts. After replacing a blade, use new bolts to provide a tight secure fit. While assembling the sonde housing, use new bolts for each bore. A small stock of replacement parts is an inexpensive way to keeping your tools in top condition, as well as preventing costly downtime.
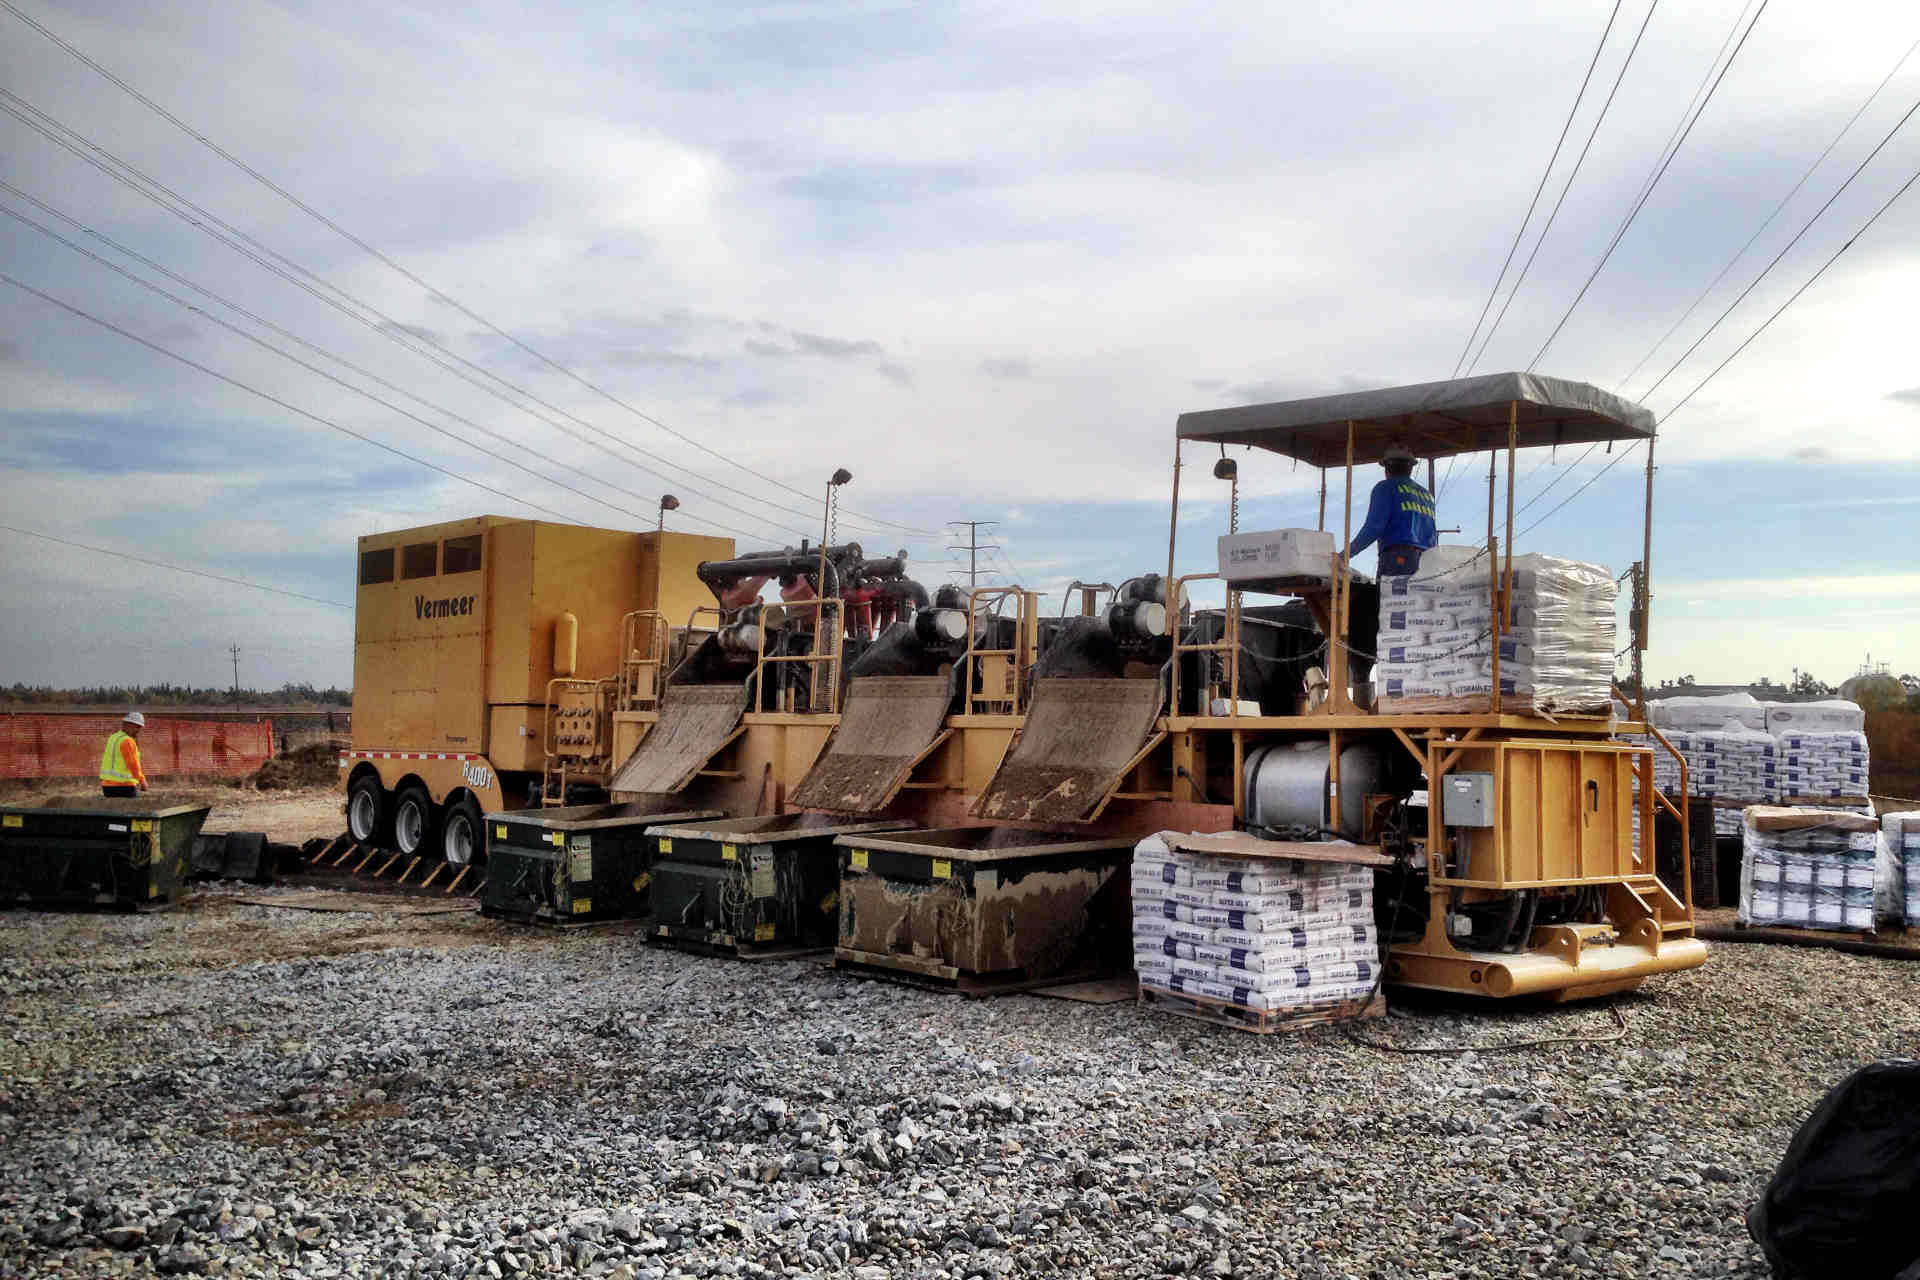
Rock Bits & Rock Housings (Up to 15,000 PSI Rock)
The offset rock bit or “toothed” bit allows operators to effectively cut and steer through very tough conditions. The skill and experience of an operator becomes even more valuable while navigating such challenging terrain. A savvy rig operator always has more than one trick up his sleeve.
- High pressure is not required: Jetting is minimally effective in rocky conditions. High-pressure fluids (especially reclaimed fluids with fine abrasive sand) will erode the water ports of the tool from the inside out. This is more common in older designed rock bits where the fluid ports are located in thin areas around the cutting teeth and crown.
- Watch the RPMs: More so than with other tools, minding the RPMs while cutting will increase both the effectiveness of the tool, as well as its life span. The basic concept of the common “toothed” bit calls for using the bit body to place the carbide tipped teeth in a position so that it can grind or carve the outside diameter of the pilot hole. Too high of a rotation speed forces additional torque loads on the cutting teeth causing the shanks of the teeth to break. Besides jeopardizing the cutting teeth, it also creates and passes additional rotational torque through the tool and up the drill string. In the case of traditional side load housing, it is common to see cracks develop between the cavity and the thin transmitter slots. The initial approach should be that of slowed rotation (120 to 150 RPMs) and enough thrust pressure that the carbide teeth are engaged against the cutting face of the hole. The cutting teeth are designed to cut, chip and fracture the rock, larger rounded or domed carbide are engineered to grind the rock to the point of cracking or chipping. The carbide on the body is designed not only to protect the tool from wear but also to grind the cutting into a smaller more suspendable (floatable) size.
- Replace cutting teeth regularly: The cutting teeth are designed to cut, chip and fracture the rock, larger rounded or domed carbide are engineered to grind the rock to the point of cracking or chipping. The carbide on the body is designed not only to protect the tool from wear but also to grind the cutting into a smaller more suspend-able (floatable) size. Keep the bit protected with hard surfacing when carbide is lost on the body and good healthy cutting teeth on the face.
- Be patient: Patience is always key in the discipline of directional drilling and nowhere is that more true than in rock boring.
Mud Motors (More Than 15,000 PSI Rock)
An entire chapter could be dedicated to the practice of horizontal drilling with a mud motor. For the sake of this article, however, the top two suggestions for maintaining efficient production and use of the tool are as follows.
- Do not stall the motor: A motor stall is usually created by increasing the fluid flow while the head is firmly engaged against the rock or by excessive thrust against the cutting face, which prevents motor rotation. Stalling the motor forces fluid through the rotor and stator assembly without rotation that will in turn leads to damage on both the motor and the pump.
- Minimize abrasives in fluid: Keeping reclaimer screens clean and in good condition will minimize the amount of abrasives in the recycled fluids. The effectiveness of a mud motor is determined by the fit or tolerance between the rotor and the stator. Abrasives in the fluid moving through the motor at high pressure will cause premature wear in this area and reduce its torque generating capacity and its productivity.
- Maintenance at 150 hours: It’s a simple fact that motors wear out. And while budget or production demands might suggest foregoing scheduled maintenance, it rarely pays to do so. The productivity of a motor depends on the collective operation of bearings, rotor, stator and a number of other parts. While the tool might still be operational after 150 hours of use, it is probably not at its full potential, thus increasing its cost of operation, not to mention increasing the chances of problems during the bore.
- It is one thing to sit down and type a list of suggestions on how to increase productivity when drilling. It is quite another to stand in the freeway median working on a project that is already over budget and waiting on you to complete the job. There are cases where tooling has been justifiably sacrificed to finish the bore. But there are also a great number of cases where good practices have increased a crew’s productivity and completion rates while minimizing tooling cost and lost holes.
Riff Wright is owner of Radius HDD Tools, which is based in Weatherford, Texas.