What you Need to Know – Pressure Testing with Inflatable Pipe Plugs
Pressure testing is critical in confirming pipeline integrity in trenchless rehabilitation and new utility installations. Whether verifying the performance of a relined section or checking for leaks in a newly installed main, inflatable pipe plugs are frequently used to isolate and pressurize specific pipe segments.
Even if you’re experienced with plug use, pressure testing involves specific safety risks and technical requirements. It’s essential to understand how equipment ratings, correct installation methods, inspection routines, and ongoing maintenance all contribute to a successful test.
This article presents practical guidance for selecting, installing, and maintaining inflatable plugs in pressure testing scenarios common to trenchless work.
Common Pressure Testing Applications
If you are performing air pressure tests in gravity sewer systems or other underground piping networks, you’ll likely use inflatable plugs. These tests, which follow standards like ASTM F1417 and ASTM C828, help detect leaks caused by cracks, joint failures, or poor installation. In some cases, isolating pipe sections allows you to stage tests and zero in on infiltration or exfiltration sources.
Selecting the Correct Plug
To select the correct plug, evaluate a combination of factors that influence plug performance and test safety:
Back pressure rating
Always check the plug’s back pressure limits for the specific pipe size and application. Consult the manufacturer or approved documentation to confirm that the plug selected is rated appropriately for the conditions of the test. Using a plug outside of its pressure range can lead to failure and pose serious safety hazards.
Pipe plug type and design
Determine whether a test-only or a bypass-style plug is required. Bypass plugs allow flow to continue through a sealed section, which may be necessary for specific testing configurations.
Pipe diameter and sealing range
Every pipe plug has a defined minimum and maximum sealing size. Verify that the pipe’s inside diameter (ID) falls within the plug’s specified usage range. Confirming this match ensures the plug will seal effectively and perform as intended.
Pipe type and structure
The design and material of the pipe impact plug performance. In certain pipe types, such as corrugated pipe, the plug’s back pressure rating may be reduced by as much as 50 percent. Plugs can also be used in elliptical pipe, but this may similarly affect their back pressure rating. Adjust expectations and plug selection accordingly.
Material compatibility and access conditions
Consider what kind of pipe you are working with, how deep it is, how it is shaped, and how easy it is to reach. Multi-size plugs can be used when the job involves pipes of varying sizes. Single-size plugs tend to create a firmer, more dependable seal when higher pressures are involved.
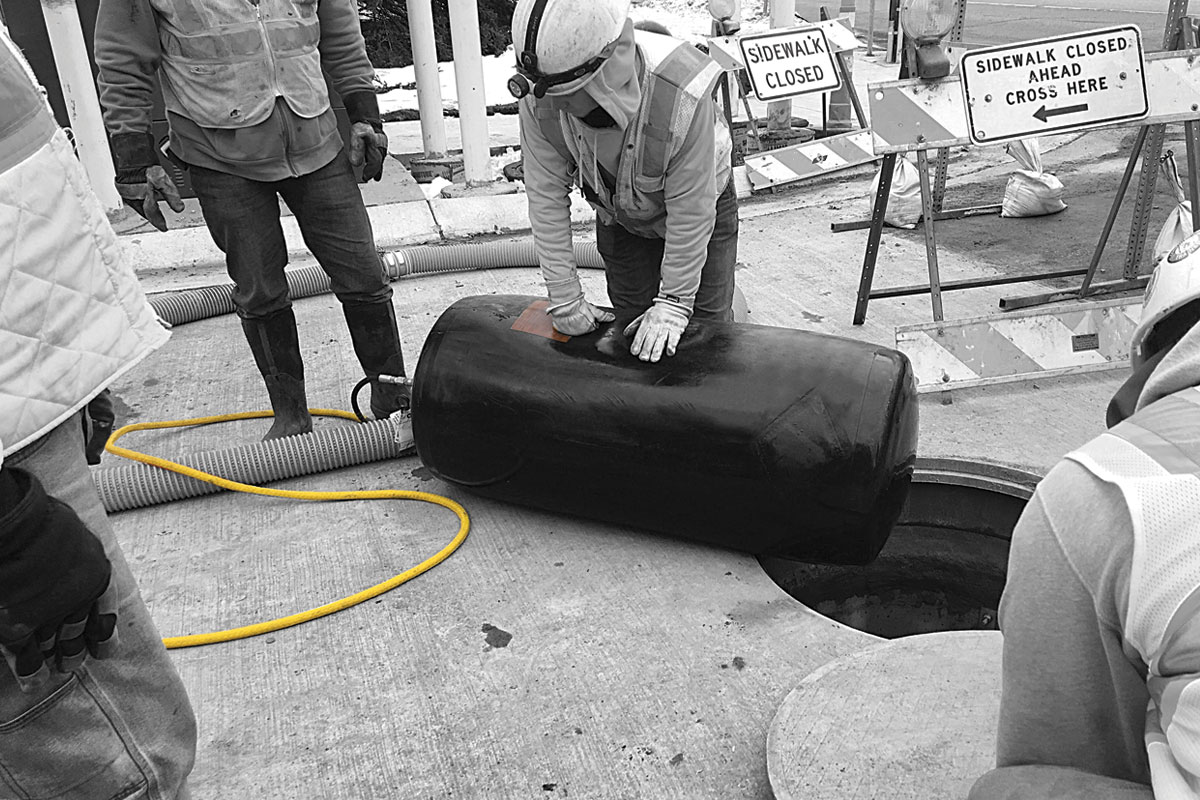
Preparing for a Successful Test
Proper preparation is essential to ensure a safe and successful pressure test. Before inserting the plug, complete the following tasks:
- Clean the pipe interior thoroughly to remove all debris. Even small fragments can create puncture points that compromise plug integrity.
- Inspect the plug and test equipment for visible wear, damage, or malfunction. Confirm that gauges are accurate and that the hoses are leak-free.
- Position the plug fully inside the pipe, inserting it at least to the depth of the pipe’s radius. For example, a 48-inch pipe requires the plug to be placed a minimum of 24 inches from the opening.
- Ensure the plug has complete surface contact with the pipe walls and does not sit over joints or inlets.
- Use sufficiently long inflation hoses to allow technicians to operate equipment from a safe distance, a minimum of 5 to 10 feet from the manhole opening.
Responding to Test Failures
If a pressure test fails, determine whether the problem is with the plug setup or the pipeline itself. Failures often result from cracked pipes, misaligned joints, or incorrectly positioned plugs. If the plug is properly installed and the equipment is functioning correctly, the next step is to isolate the leak.
Cherne provides options for staged leak testing. You can leave the back plug in place and use a 400-ft triple hose reel to move the front plug further down the line, testing every 50 ft or as needed until you locate the leak.
Another approach uses an interconnector hose, about 22 ft long, that connects the front and back plugs. This setup allows testing in 22-ft increments to pinpoint the source of the leak more precisely.
Safety Protocols
When pressurized, inflatable plugs store a large amount of energy. If a plug fails, the sudden release can blast air and debris out of the manhole opening with dangerous force. To help keep workers safe, follow these safety steps:
- Never exceed the plug’s rated back pressure.
- Maintain distance during inflation and testing. All personnel should remain clear of the manhole opening, known as “the danger zone.”
- Secure plugs as necessary and monitor inflation using calibrated gauges.
- Use rupture discs or pressure relief systems where appropriate.
Cherne offers a solution to overinflation by equipping plugs with a field-replaceable rupture disc. If the plug is overinflated, the disc releases pressure, allowing the plug to reseal and remain reusable after the disc is replaced.
The Value of Training
We advise that project managers require thorough training for all personnel who conduct pressure testing. It’s important to understand how to select, install, test, and store inflatable plugs correctly. Training should include instruction on inflation techniques, hazard identification, and emergency procedures.
Cherne provides resources and support to help contractors and municipalities access on-site or remote training tailored to their operational needs and plug systems.
Plug Maintenance and Inspection
Maintaining plugs between uses is essential to maximizing lifespan and ensuring reliable performance. Recommended practices include:
Clean the plug after each use using mild soap and water. Avoid using harsh cleaning agents that may cause damage to the plug material.
During post-use inspections, inflate the plug to no more than 1 psig (pounds per square inch gauge). Apply soapy water to the surface and check for leaks around bolts, plates, and fittings. Do not use the plug if it shows any signs of cuts, wear, or deterioration. A damaged plug is unsafe and should be taken out of service.
Never inflate a plug more than 1 psig when it is outside of a pipe. Over-inflation in open air may result in plug failure.
Conduct a full-pressure test in a secure environment. Monitor the plug for at least 24 hours to identify any slow or hidden leaks.
Store plugs in a dry location, away from direct sunlight, ozone, or other ultraviolet light sources. Storage temperatures should remain below 110 F. Plugs may be stored vertically (suspended) or horizontally.
Tighten bolts or replace fittings as needed. Contact the manufacturer if repairs are required.
In day-to-day trenchless work, pressure testing with inflatable pipe plugs is a regular part of verifying that a line is sealed and ready for service. When you take the time to choose the correct plug, set up the test correctly, follow safety steps, and inspect gear between jobs, the results speak for themselves. Solid training and reliable tools go a long way in protecting crews and keeping infrastructure running as it should.
Jason Maglietta is eastern regional sales manager at Oatey Co.
Latest Posts
- UV CIPP Scales Up for Large-Diameter Culverts
- Learn how a Vermeer 24×40 HDD helped a contractor grow
- Kondex Cited as Best Downhole Tools
- Tri-Con™ Drilling System: Redefining Speed and Strength in HDD Tooling
- Verifying Quality Throughout the Manhole Rehabilitation Process